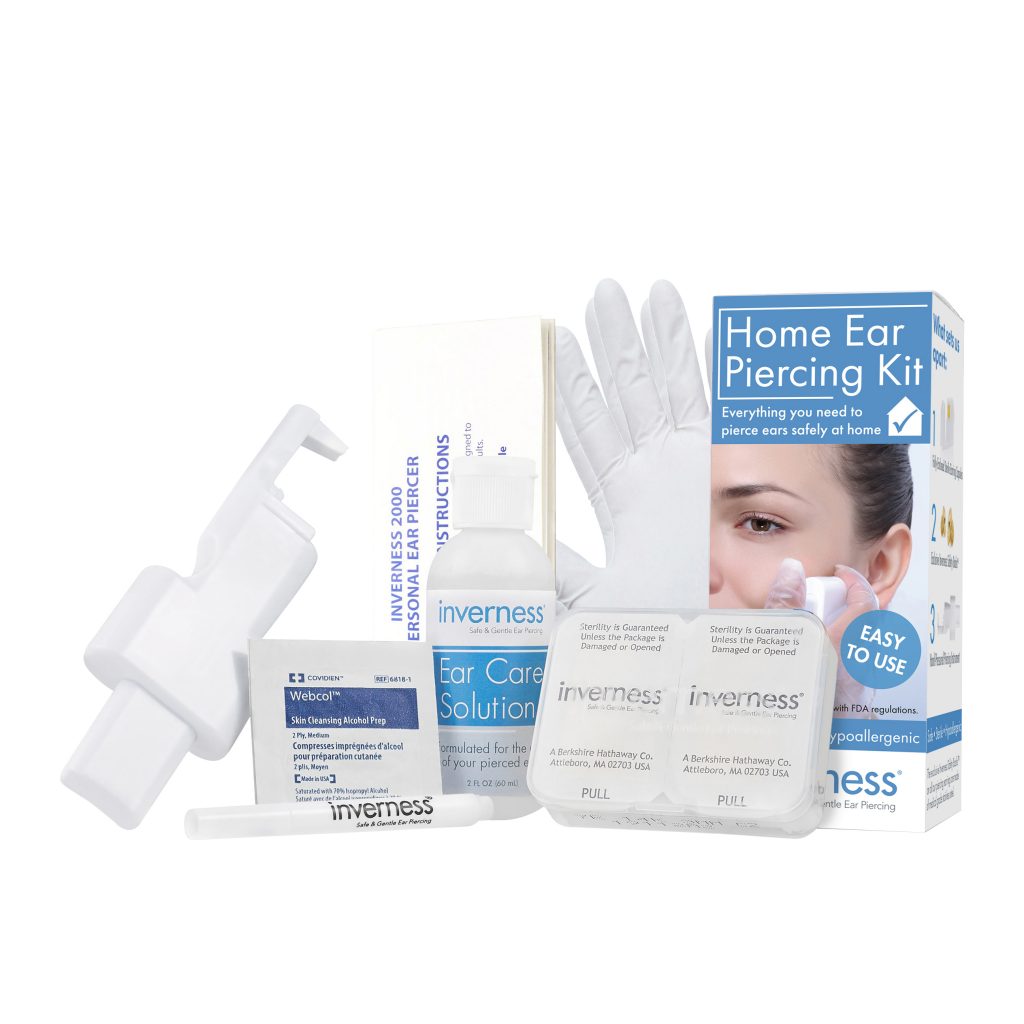


Set Up Your Piercing Space
- Find a clean well-lit space with a chair for the person to be pierced and a table where you can spread out your piercing supplies.
- Review all the supplies included and make sure you know what everything is for.
- Read your piercing instructions carefully before you start. Keep the instructions handy for reference when you pierce.
Reminder: follow the instructions provided in your home piercing kit carefully. Here are some additional tips to help your home piercing session go smoothly!
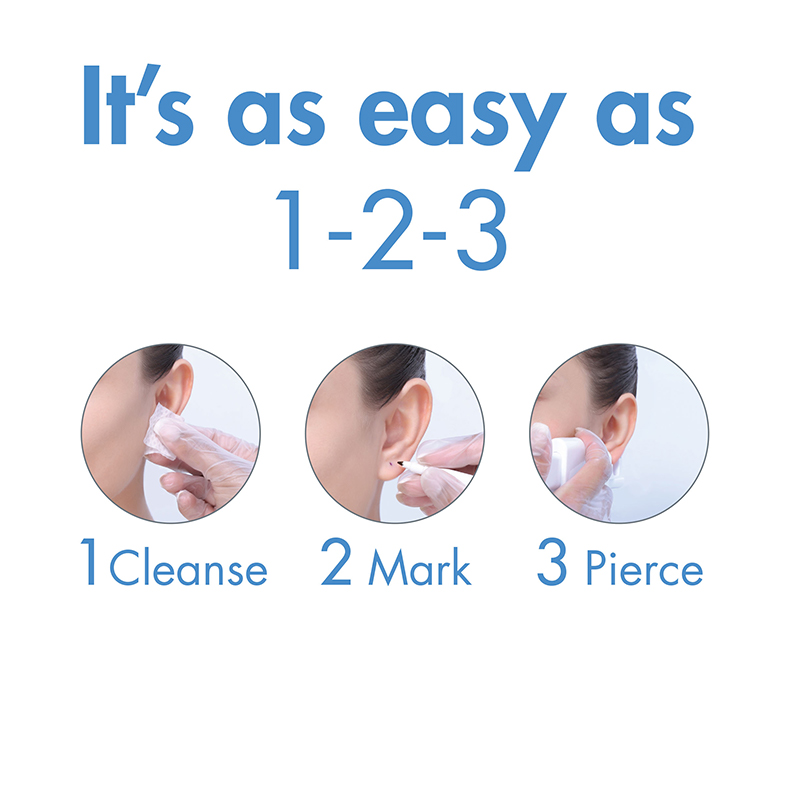
- Dotting the Ear:
- Wash & dry your hands carefully and put on the single-use gloves provided BEFORE you cleanse the ear for dotting and piercing.
- The front and back of the piercing site should be cleansed with the alcohol towelette and allowed to dry before you dot the ear.
- Using the Inverness surgical marking pen, mark the ears. Start by placing a small dot on one ear. Use a mirror to make sure the dot is in the right place.
- If the dot is not where you want it, clean it off with the alcohol towelette and start again!
- Proper Aiming:
- Hold the instrument firmly in one hand with the back of the piercing earring cartridge against the back of the ear.
- Place a finger from your other hand against the back of the instrument (behind cartridge) for support.
- Make sure the instrument/cartridge are parallel to the face. You want the earring to go in straight – not at an angle to your face.
- Use even pressure, slowly depress the plunger to push the inner capsule out of the cartridge toward the dot.
- Aim with the plastic tip of the cartridge ONLY – do NOT push the earring post out of the cartridge until you are lined up and ready to pierce.
- Make sure your angle is right and that you are lined up properly before you pierce.
- How to Pierce
- Once you are lined up and ready to go, pierce quickly and firmly by depressing the plunger all the way until it can go no further.
- Hold firmly for a slow count of 3.
- Release and move the instrument down and away.
Repeat these steps for the second ear!
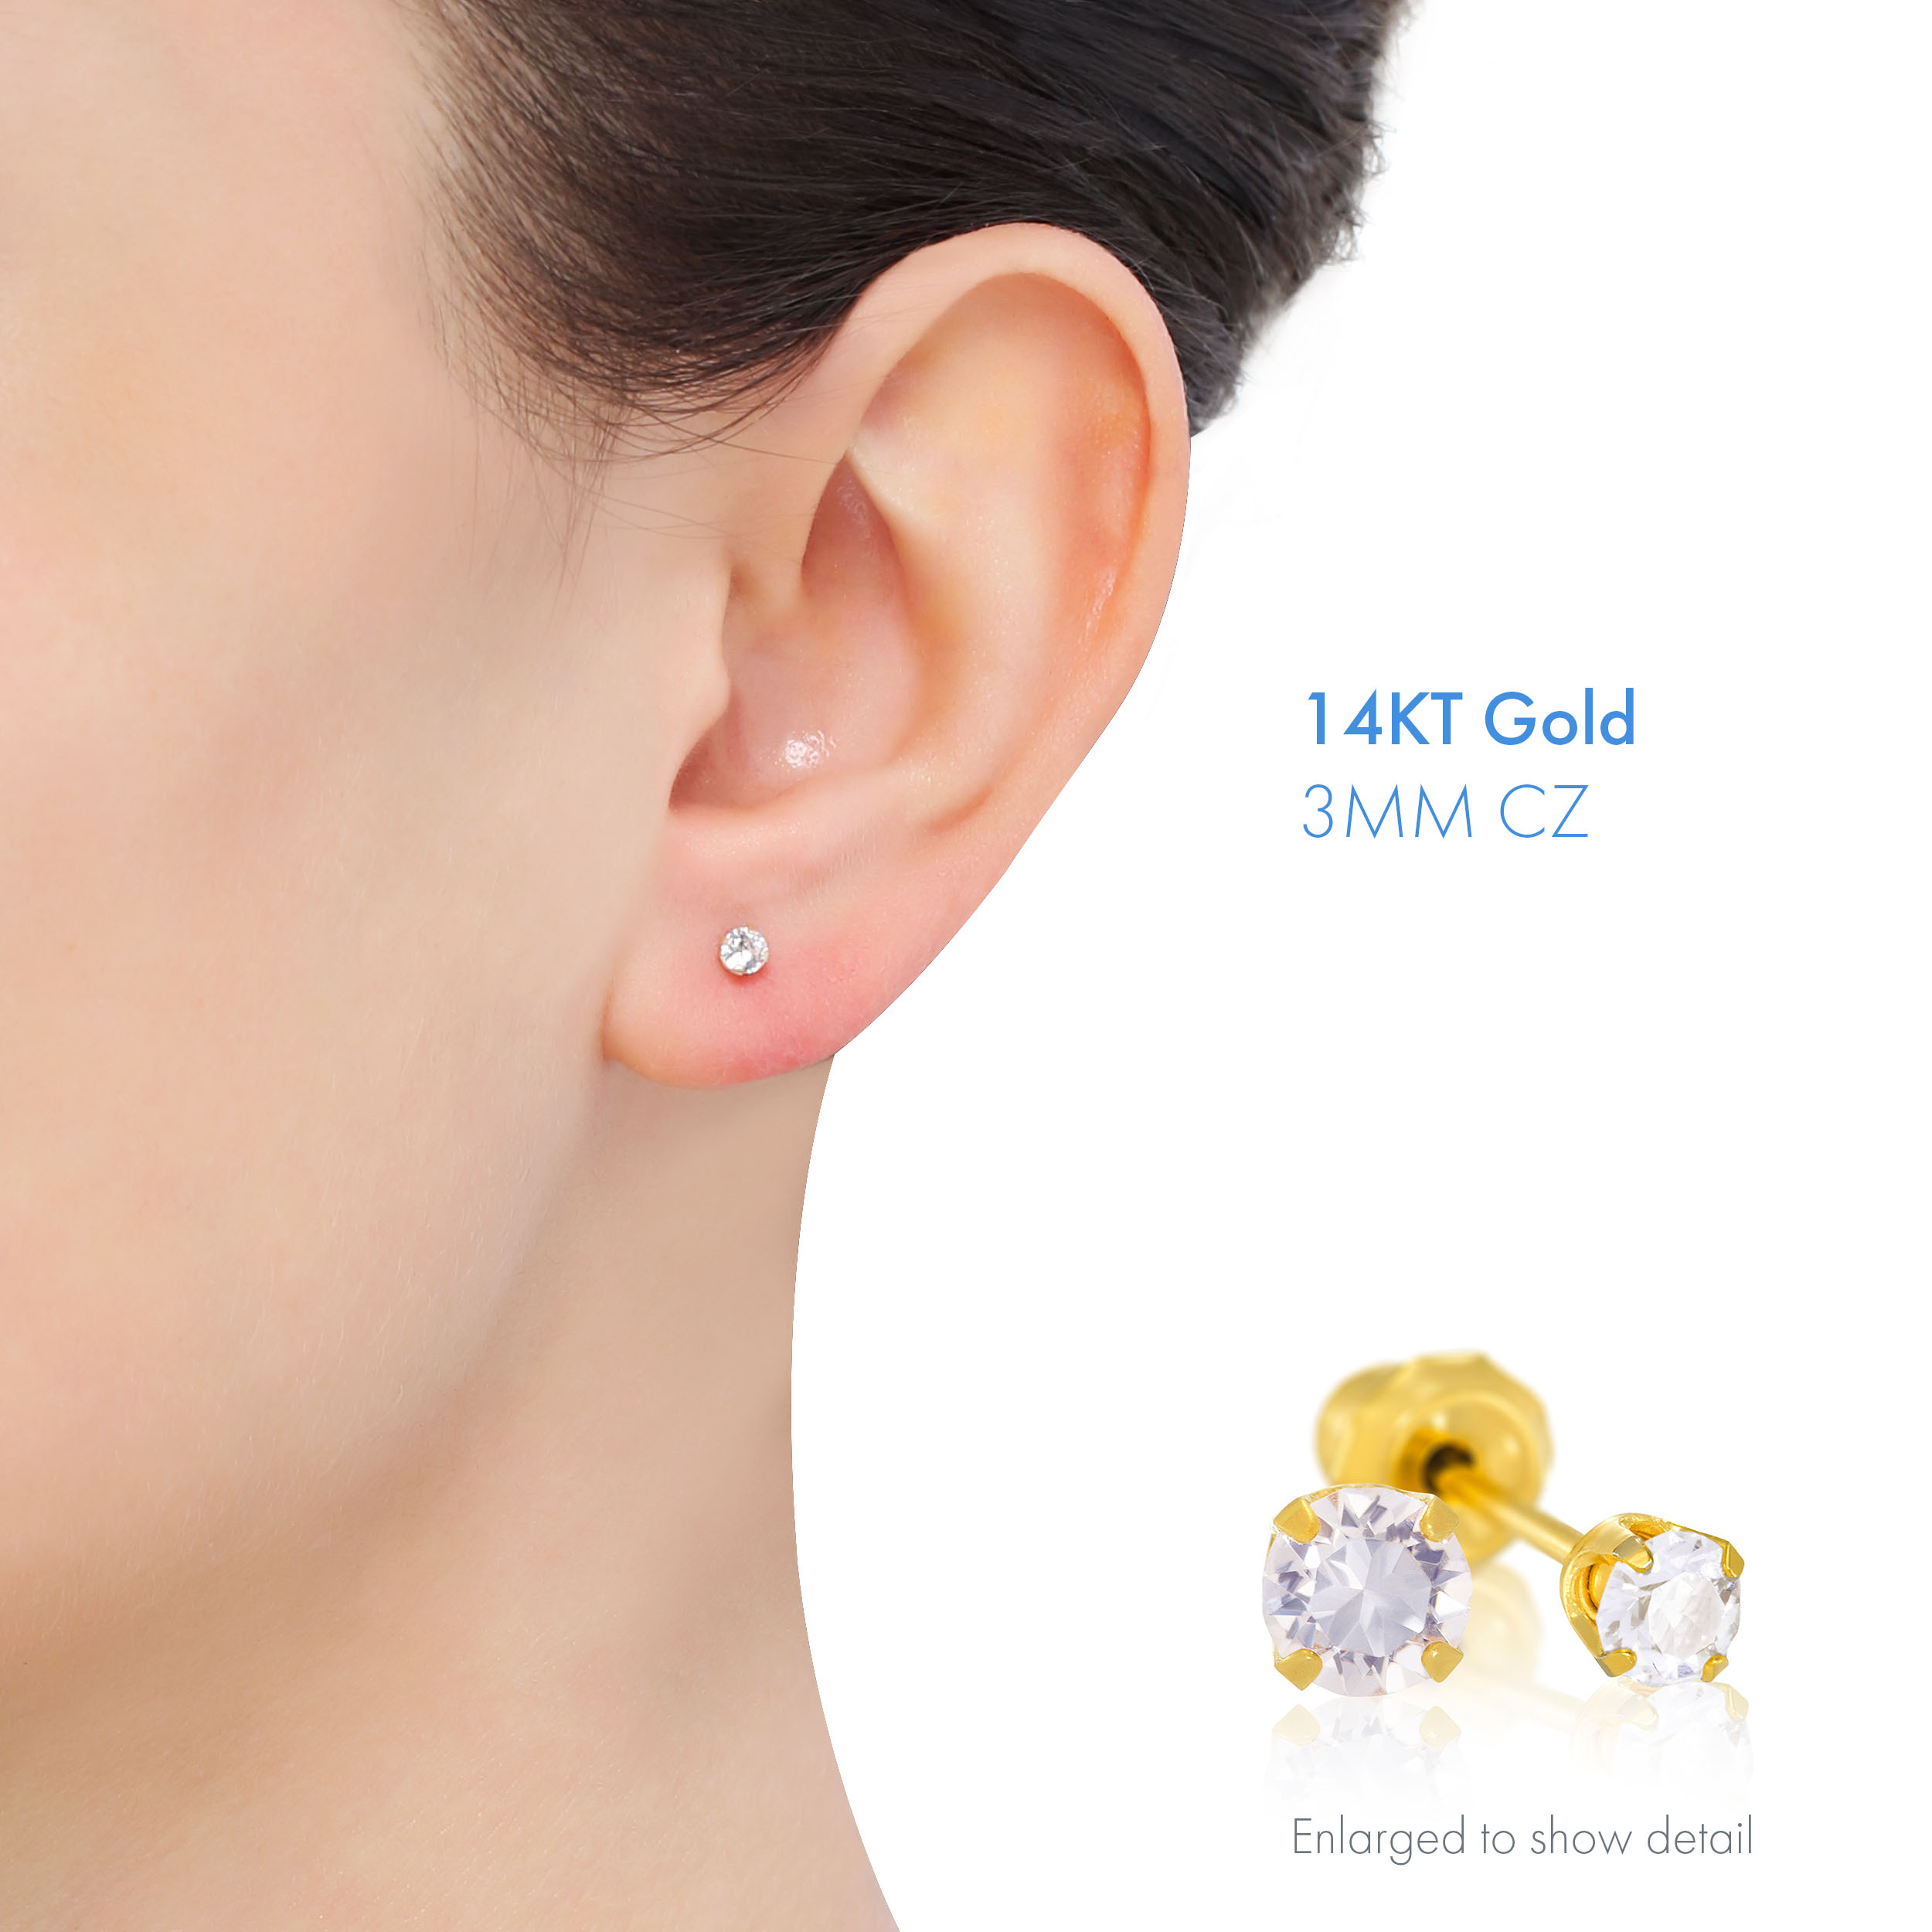
The dots on this ear show where it is safe to pierce with the Inverness Home Piercing Kit.
Before dotting, look at the size and shape of each ear and placement of existing piercings.
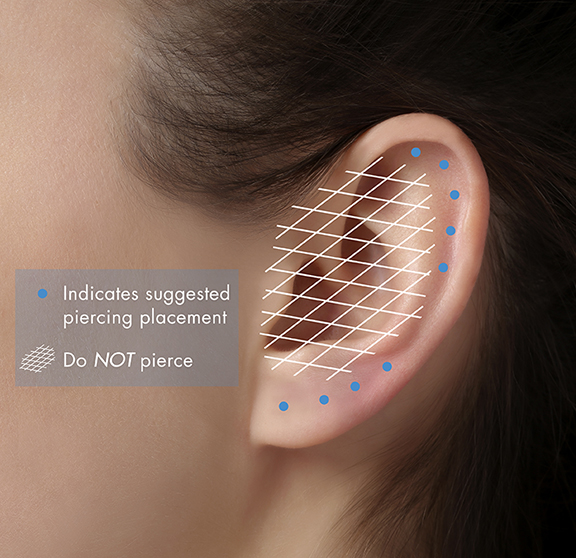
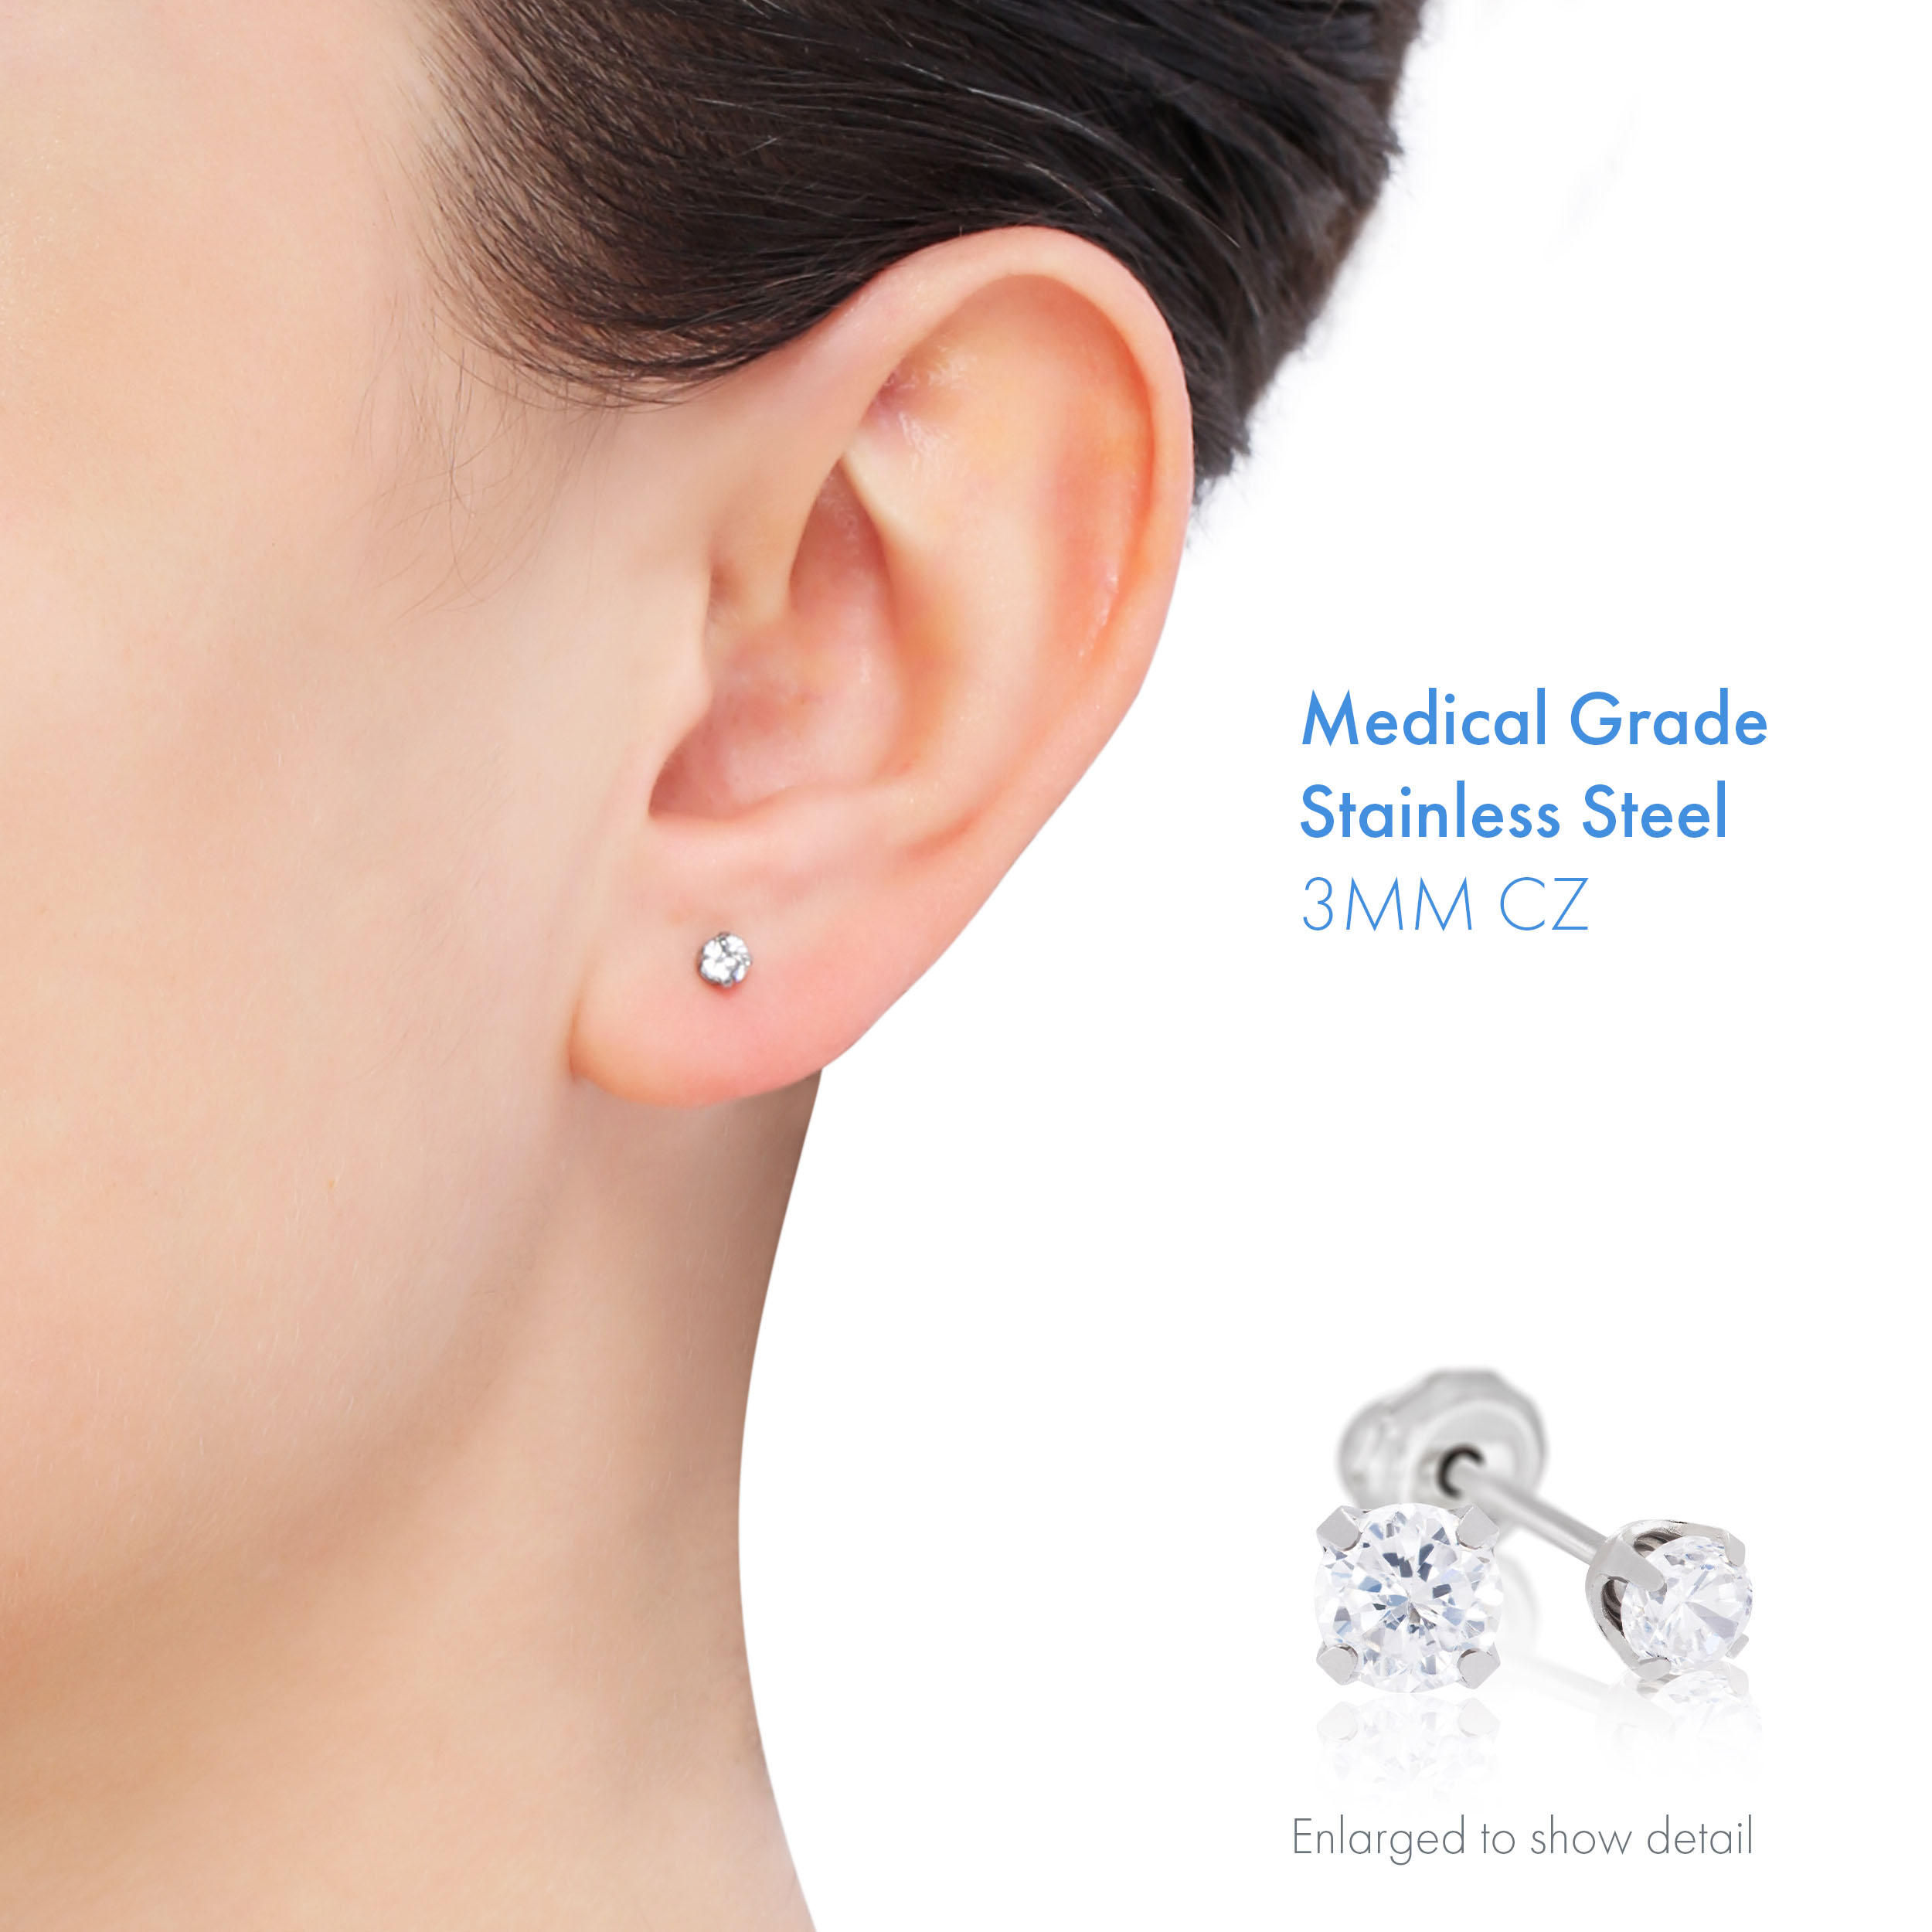
First Ear Piercing in the Earlobe: Follow the natural line of the ear. Place the dot on the center of the earlobe(s).
Multiple Earlobe Piercing: Follow the natural line of the ear. Mark dots 1/4” to 3/8” apart, depending on the size and shape of the ear and the earring styles to be worn later. Check placement for uniform spacing between each piercing and for alignment across the face.
Outer Cartilage Placement: Cartilage piercings should be placed in the open channel, just inside the curl. Do not pierce any spot where the curl curves tightly into the ear and covers the channel making it difficult to dot and pierce.
Thinking about a second or third piercing for your earlobe or outer ear cartilage? Keep these tips in mind:
- Remember that every ear is unique. Examine your ears carefully to determine whether they are the right size and shape to fit the piercings you want and the earrings you like to wear.
- Space your new piercings properly. The average person will need about ¼” between holes, but spacing is unique for everyone. The hole location and spacing will be determined by the size of your ears and your preferred earring style.
- Take your time and review the locations dots carefully before the piercing. This is an important step, so don’t rush it! If possible, remove your other earrings before dotting and piercing. Look in the mirror and make sure that the dots are lined up where you want them. If not, simply clean them off and dot again!
Safe healing starts with proper ear piercing aftercare. Follow the aftercare instructions provided with your Inverness Home Piercing Kit.
Here are the basic guidelines to follow:
1. Healing Time
Earlobe Piercing: Leave piercing earrings in the ear for 6 weeks. Do not remove during this period.
Cartilage Piercing: Leave piercings earrings in the ear for 12 weeks. Do not remove during this period.
2. How to Clean Your Piercing
Each day and with clean hands: Cleanse 3 times daily. Using Inverness Ear Care Solution, thoroughly cleanse the front and the back of the earlobe around the earring and pierced area with a cotton swab soaked in a generous amount of solution.
Turn 3 times daily: Turn earrings while cleansing.
3. When can I change to new earrings?
Earlobe Piercing: After the 6 week healing period is completed, the piercing earrings can be removed and changed to other styles. During the 6 months following the initial healing period, do not go longer than 24 hours without earrings or the piercing may close. We recommend wearing light stud style earrings during this time.
Cartilage Piercing: After the 12 week healing period is completed, you can change to new styles. We recommend sticking to light stud style earrings to protect your piercing. To prevent your piercing from closing, keep earrings in 24/7 for 6 months after the healing period. If you want to change earrings, replace immediately with another or your new piercing may close.