I have a confession to make. I have been head of marketing at Inverness for over 5 years now, but I had never been pierced with our system until last month. I am happy to say that my teenage daughter has been pierced with our system twice, but I had never experienced it for myself. I had my first ear piercing back when I was 13 years old and the only options were the doctor’s office or a needle and ice cube. I chose the doctor’s office.
I had been wanting a second piercing for a long time and the perfect opportunity fell in my lap when our newest field trainer, Mary, joined our team in April. Mary came to our offices for orientation with Deb, our Director of Training, and needed someone for her first “live” piercing with our system. I was happy to volunteer.
Though my ear piercing took place in our conference room, we followed all the steps we would have taken if this had been in a retail store using our Inverness ear piercing system.

Earring Selection
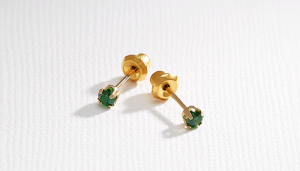
The first step – as always – was to choose the earrings for my piercing. I went with one of our most popular styles: a classic 3mm CZ stone set in Medical Grade Stainless Steel. I knew I would be wearing these earrings for the 6 weeks it takes an earlobe piercing to heal, so I wanted a simple look that could go with anything.
Preparation
After choosing my earrings, Mary pretended that I knew nothing about Inverness and reviewed the ear piercing procedure and aftercare process with me. She then had me fill out and sign a release authorization form to verify that I understood the process and how to care for my newly-pierced ears.
Keloid Check
Next, Mary put on disposable gloves and checked my ears to be sure I could be pierced. If she had found any possible keloid scar tissue in my earlobes, she would have stopped the process and told me to see my doctor to determine whether I could be pierced. Thankfully, I was good to go.
Step 1: Cleanse
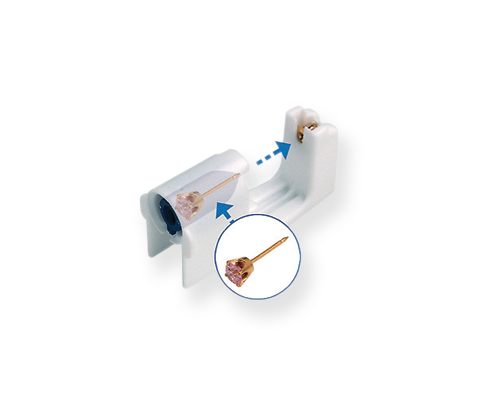
Now that we had the all clear, Mary loaded two Inverness ear piercing instruments (one for each ear) with the sterile cartridges containing my piercing earrings. Then she cleaned my earlobes with an alcohol wipe. Since it’s important to let the alcohol dry before marking the ears, Mary used this time to review the aftercare instructions and to see if I had any questions about the process.
Step 2: Mark
Once my earlobes were dry, Mary could move on to one of the most important and time-consuming steps in the ear piercing process: making the placement dots. The Inverness system includes a surgical marking pen to be used solely for this purpose. The pen contains special gentian violet ink that has antibacterial properties. These are the same pens surgeons use to mark their patients prior to surgery.
Deb spent quite a bit of time showing Mary how to evaluate my ears for dot placement. This can be tricky since no two ears are alike or symmetrical on a person’s head. Since this was my second piercing, Deb suggested she place the dots about ¼” from my first piercing (about the diameter of a pencil eraser) so that I will have plenty of room to wear different earring styles together.
If I had been unhappy with the dot placement, Mary would have simply cleaned off the dots with an alcohol wipe, waited for them to dry, and dotted again.
Step 3: Pierce
Once the dots were in place, the actual piercing took very little time. Deb showed Mary how to line up the instrument for accurate placement and positioning. Our system is designed to make this part of the process very simple.
Once she had the instrument lined up correctly, Mary quickly and firmly squeezed the instrument handle which caused the sharp tip of the piercing earring to go through my earlobe and connect with our exclusive Inverness Safety Back™ in one smooth, quiet motion. Seriously. It was that easy. I barely felt a thing – just a little bit of warmth in my earlobe.
Aftercare
The hardest part for me after my piercing was remembering to keep my hands off my new earrings unless I had washed my hands first. I had to keep reminding myself not to touch and twirl my earrings. It was very tempting!
It’s been 5 weeks since my piercing, and everything is healing well. In 7 days I can change into new earrings. Check out next week’s blog for tips and details about ear piercing aftercare. As always, if you have any questions about Inverness or our ear piercing system, please feel free to contact us.

